9 Tips for How to Choose the Right Wave to Surf
Learning to surf is definitely fun but it can also be frustrating with the steep learning curve.
After mastering the basics of surfing, you will probably want to know how to catch more waves to help you improve.
As such, I’ve prepared this post packed with tips to help you choose the right wave to surf. These tips will cover everything you can do to get a better understanding of picking the right wave for you, helping you to progress that bit quicker.
The tips below are all based on my own experience from over 20 years of surfing, so they are here to save you learning the hard way just like I had to!
Ready? Let’s get to it!
1. Watch the others first!
When you get to a surf spot, before even deciding whether to go in, you will be looking at the waves and the other surfers.
You might think this is just a simple question of gauging whether to paddle out or how big the waves are, but it gives you a vital clue as to which waves are best.
Picking your spot to paddle out
You should look to see where the people having the longest and best rides are starting from. Is there a particular sand bank or section of the beach that is throwing up the best waves? Or are the best waves being ridden by the surfers starting closer in to shore?
Paying close attention here should help you to pick out a spot to paddle out in and also to gauge roughly where you will want to sit once you get out to the waves.
Ability
Also look at the ability of the other riders in that area. If they are of a much higher level than you then chances are that it won’t be a good fit for you to paddle out there.
If you are surrounded by the best surfers when you are still learning or not that confident, then you will probably not have many waves to choose from as the best surfers will often be catching lots of waves.
As such, try to pick a spot to paddle out that has waves that you can ride but also that matches your ability.
If you paddle out into the heaviest part of the break, you probably won’t be welcomed by the others and they certainly won’t be giving you waves easily, either!
2. Position yourself in the line-up
Once you have paddled out into the right part of the break for your ability and for the waves, then you need to start really keeping an eye on the best waves that are coming through.
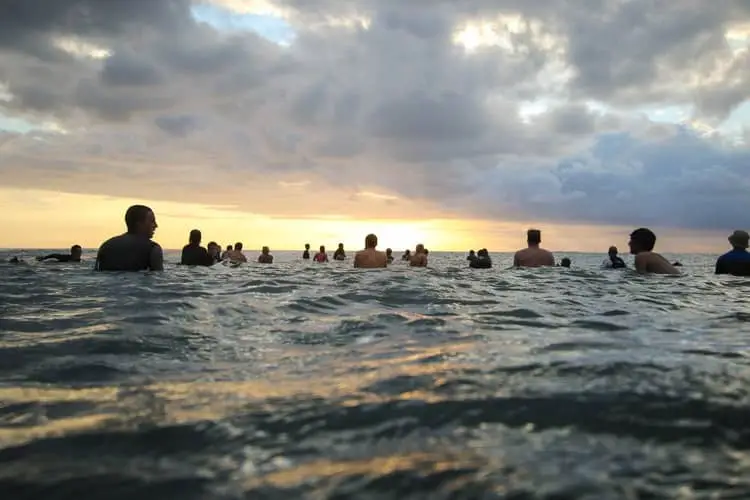
Although you will have looked at the spot from the beach, being out in the line-up is a different story since it then becomes a ‘moving playing field’ with things like waves, currents and other rides taking away from your ability to focus on positioning.
However, simply by watching the riders who are already getting waves from up close, you should start to try and figure out where the best spot to sit will be.
This is what surfers often call ‘lining up’, where they start to triangulate their position in the sea with two objects elsewhere. For instance, one spot I used to surf at a lot had specific street light straight ahead and an old building at 90 degrees; using these two points for reference, I was able to keep my position in the spot where the best waves broke and have more fun rides. Remember to always pick an object that is not floating in the sea as they will always move, however slowly!
Keeping your position in this way is not only good for choosing the right wave but is also crucial if there is a rip current running through the line up since you will be moving away from the best spot without realizing it, so keep your wits about you and remain in position.
3. Watch the shadows on the wave face
This may sound a little strange but hear me out! When the waves are rolling in towards you, it can sometimes seem like they take forever to break.
This long wait also make it hard to judge when they are going to break, especially when you are nearby.
Yet again, the key here is to use your observation to help you pick a good wave.
When you see good waves coming in, pay close attention to the shadows on the wave face. You will likely see that a shadow coming down the face gives you a tell-tale sign that a wave is about to break.
Sometimes it will look like waves are going to break at any second, yet the hold off for a few more seconds or even more.
In this case, keep your eyes on the shadows and try to figure out the timing of when and where to catch the best wave.
If you are constantly missing waves, then it might be time to paddle a bit further in as you will no doubt see that the waves are ‘backing off’ and holding up that bit longer before breaking.
4. Only ride waves with a ‘shoulder’
When you finally get a chance to pick a good wave from putting yourself in the right position, then it comes to figure out which waves are going to offer a chance of a ride.
Unfortunately, many waves at the beach will ‘close out’, where the wave breaks at the same time leaving you no unbroken wave to ride along.
However, the key to picking a good wave that will open up and offer a ride is to look for a shoulder; this refers to the part of the wave to the right or left of the breaking peak of the wave. Waves will often slope off or taper towards the shoulder, making them much more rideable than waves that dump and closeout.
As such, look for waves that have a defined peak and a shoulder that is smaller as you look to the right or left.
These waves will give you an open face to ride along, making them perfect for getting more out of them than just a bit of take-off practice!
Remember that waves that are the same height all across are certain to closeout so just ignore them.
5. Sit further out than you think
This is something that I found out after several years of learning to surf. I often used to sit a little bit too close to shore to have an easy escape route if the waves got a bit heavy, but that didn’t always work too well.
One of the issues I had was that I was constantly sitting in the impact zone, where the breaking waves land on your head constantly if you are foolhardy enough to sit there!
But, after a good few years of this, I decided enough was enough and that I would sit further out to avoid the constant duckdiving under the better, but broken, waves.
This meant that I then could see much more of what was coming, and it also gave me a much better chance of catching the set waves as they rolled in.
By being further when you are surfing, your wave choice can improve since you will have advance warning of any bigger sets and you will also be able to adjust quickest for any waves that you want to get to that might be a long way off.
Combining this positioning with riding a bigger board also gave me more confidence since I could see more clearly and paddle faster, which was definitely a step-change in my surfing experience.
You will also have fewer ‘sets on the head’ if you sit further out since you will likely be able to either ride them or duckdive under them, something which is really hard to do if you sit even just a little closer to shore.
6. Paddle like crazy!
When you have set your sights on the right wave, then it is time to paddle like crazy.
This is because it can take a good while to get up to full speed when paddling on your surfboard.
Set the direction in which you want to paddle to catch your chosen wave, this can be angled or straight. You can also make small adjustments as you are paddling but remember that these will slow you down and might cause you to miss the wave.
Keep your head straight and try not to rock side to side on your board as it will slow you down.
Some of you might be thinking about times you have caught waves when you were not paddling fast. Well, although you can certainly catch waves without paddling at full speed, these are usually the most difficult waves to take off on. Late takeoffs are the reserve of more experienced surfers, so there is no need to try and do these too early on in your surfing progression.
7. If in doubt, pull out!
When you are just about to take off, there comes a moment, often just a split second, in which you will have to make the crucial decision: take off or abort.
This isn’t always as simple as it seems, since there can be many other people out in the lineup and you may not always be able to see them.
As such, always wait for a wave that you have room to take off on without any other people within at least 20 yards in front of you.
20 yards might sound like a lot but, when you factor in the speed of a wave, plus a 7 foot long board and another 7 foot of leash, it suddenly becomes quite a small area.
If there are people who are paddling out in a diagonal position from where you are taking off you will still need to proceed with caution as they will be closer to you once up and riding but it is easier to avoid them than anyone straight in front of you.
8. Do a last-second check
Looking over your shoulder is a simple thing to do in normal circumstances but some beginner surfers might forget this when caught up in the excitement of finally catching a good wave.
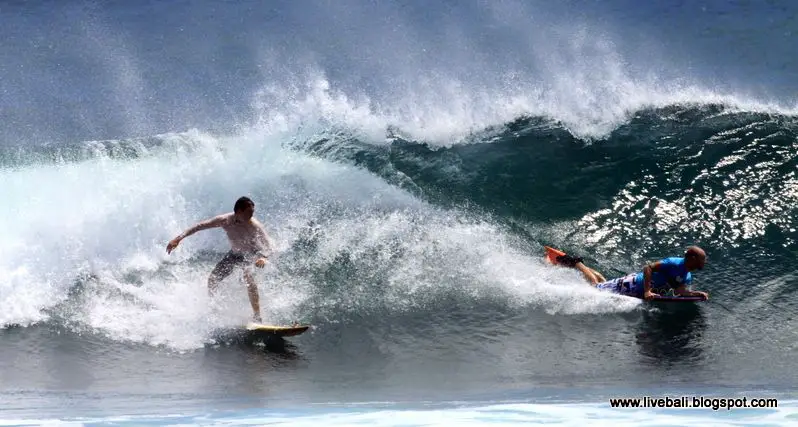
Specifically, I mean look over your shoulder towards the breaking wave. This is because there might be someone already up and riding that you somehow missed previously.
Taking a wave that someone is already riding on towards you is poor surf etiquette and is called ‘dropping in’ on someone. Doing this is dangerous and will also make you less likely to be a popular person at that spot in that lineup, so just remember to look back before taking off!
It sounds crazy but there are many people who learn to surf and don’t even realize that this is bad so, take it from me, it is most definitely better to just have a quick look back and check that there is nobody behind you than drop in and hurt them or, at very least, anger them and others in the surf!
This last-second check is also useful for helping you to see what kind of position you are in for taking off and riding the wave, something that we’ll look at in the next section below.
9. Don’t get too close to your wave!
You will also want to catch a wave that is going to break at the right time to give you a chance to take off.
If you watch how the wave ‘peels’, that is when it is breaking left or right from the peak of the wave, then you will see that some waves are faster than others.
Equally, you will notice that some waves break quite slowly, which are idea for learning to surf on.
When you position yourself for a take-off, and when you look back over your shoulder, you can then see how far away the breaking wave is from you.
This will let you know how much time you have to take off. If the breaking wave is approaching you really fast then you might not have a good chance of being able to get up to your feet in time.
On the flip side, if the breaking wave is a good few yards (or meters) away from you, then this should give you enough time to take off and start riding the wave.
Try to put yourself in the sweet spot where the wave breaks close enough to you for you to catch it but not so close that it will just land on your back or dump you into the flats in front of the broken wave!
Related Questions
How do beginners get waves? By being patient and observing the line up for the right waves. It’s also crucial that learner surfers paddle out in a spot that suits their level since trying to ride an advanced wave early on will mean catching hardly any waves and is dangerous.
Be mindful of your limits and follow all the tips above in this post for getting waves.
What to do when a wave breaks on you? There is not really a lot that you can do since a wave landing on you will entirely control what happens next. However, in the seconds before it happens, you might want to bail your board, pushing it away from you or at least try to relax.
Relaxing may seem totally unnatural but if you are tense and stiff when a wave hits you, it will hurt that bit more as your body’s tension will act like a paddle, pushing you further and for longer underwater.

